Valentine Fairy Dogs Sublimation Clipart – A Practical Guide for Creators and Small Business Owners
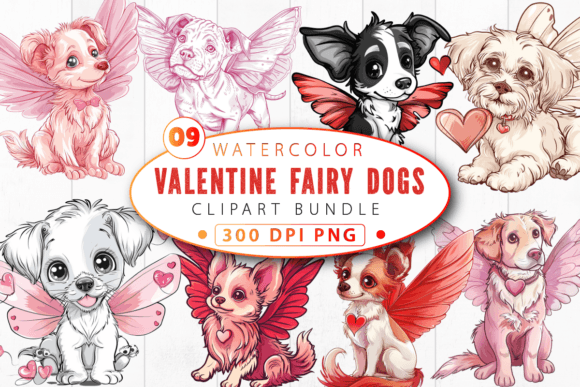
Valentine Fairy Dogs Sublimation Clipart offers a ready-to-use asset designed for print-on-demand and custom merchandise workflows. Unlike generic stock graphics, this clipart set focuses on a specific seasonal theme—valentine fairy dogs—with transparent PNG files at 300 dpi resolution. For anyone producing t-shirts, mugs, stickers, tumblers, or transfers, understanding how to integrate such clipart into your process can save time and improve consistency.
This article walks through the nature of the product, where it fits into a production pipeline, and how to handle it for sublimation, waterslides, screen-printing, and similar methods. The goal is to help you use this digital asset effectively without guesswork or wasted effort.
What Is Valentine Fairy Dogs Sublimation Clipart?
The product is a digital download containing one or more PNG files. Each design features fairy dogs with Valentine motifs—hearts, wings, pastel colors, whimsical elements. The key characteristics:
- PNG format with transparent background – no white box around the artwork, which matters when layering over colored substrates.
- 300 dpi resolution – suitable for print sizes up to around A4 or 8x10 inches without pixelation, depending on the file dimensions.
- Digital only – you receive the files, not physical products. You handle printing and cutting.
Because the clipart is designed for sublimation, the colors are likely intended for reverse printing (mirrored) and heat transfer onto polyester or coated materials. However, the transparent PNG also works for waterslide decals, screen-printing exposure, and sticker cutting.
Why Transparent Background and 300 dpi Matter in a Workflow
When you integrate clipart into a production workflow, format and resolution affect every step from design to final output.
Transparent background eliminates manual masking. You can place the fairy dog design directly onto a mockup of a mug or shirt, adjust size, and see exactly how it interacts with the background color. This is especially critical for sublimation where white areas in the image would prevent ink transfer on dark items (unless using a white underbase). For waterslides, transparent areas let the decal substrate show through, which can match the underlying surface.
300 dpi is the standard print resolution. If you scale the image up too much, you lose sharpness. For most items like standard mugs (8–11 oz) or t-shirts (front print up to 12x14 inches), a 300 dpi PNG from a decent source file holds up well. Check the pixel dimensions of the individual clipart files. A 3000x3000 pixel image at 300 dpi prints at 10x10 inches. Smaller files require careful scaling to avoid pixelation.
Always verify the file dimensions before building your print layout. Open the PNG in your design software and note the canvas size. Plan your product accordingly.
Where This Clipart Fits Into the Production Process
Using clipart is not a one-click operation. It sits between creative concept and physical printing. Here is how it can be placed in a typical workflow:
1. Preparation and Asset Management
Before you start designing, download the files and store them in a logical folder structure. Name the files consistently (e.g., Valentine_Fairy_Dog_Heart_01.png). If the set includes multiple variations, consider creating subfolders by theme or color. This is especially useful if you run multiple shops or seasonal campaigns. You might also back up to cloud storage for access on different devices.
2. Design and Layout
Open your preferred design software—Adobe Photoshop, Illustrator, Affinity, CorelDRAW, or even Canva if working with simpler layouts. Import the transparent PNG. Because the background is transparent, the fairy dog will appear with no square backdrop. You can:
- Resize proportionally (hold shift while dragging).
- Add text, borders, or other elements around or behind it.
- Duplicate the image for multi-print sheets.
- Apply color overlays or effects if needed (though altering the original may degrade quality—work on a copy).
If you are creating a sublimation transfer, remember to mirror the image horizontally before printing. Failure to flip is a common error. For waterslides and screen-prints, mirroring is usually not required—unless you are doing reverse transfers. Check your method’s guidelines.
3. Pre-Printing Considerations
Before printing, evaluate your substrate. For sublimation, the clipart must be printed with sublimation ink and paper. The transparent background means the white areas of the image are clear (no ink), so the design will show as if it were a sticker on the substrate. If you want a white underbase for dark items, you will need to add a white layer manually (often a separate pass or a white toner printer). Most standard sublimation works best on white or light-colored polyester fabrics or coated surfaces.
For waterslides (inkjet or laser), the transparent PNG allows you to print onto the decal paper, and the clear areas become the decal film. This is great for ceramic mugs or glass, but you may need to seal it with a clear coat after application.
For screen-printing, the clipart can be used to create a stencil. Convert the PNG to a high-contrast bitmap (black/white) and expose it onto a screen. The transparent background helps isolate the design.
For stickers and tumblers (vinyl or printable adhesive), the transparent PNG is used directly in cutting software like Cricut Design Space or Silhouette Studio. The software detects the transparency and cuts around the design outline. However, if the design has fine details (like fairy wings or thin lines), ensure your cut settings are dialed in to avoid tearing.
4. Printing and Transfer
Once your file is ready, print to your specific medium. Sublimation requires a heat press. Waterslides need water immersion and careful application. Screen-printing uses squeegee and mesh. For each method, the clipart’s color profile may need adjustment. Usually, PNG files are sRGB. If you are printing in CMYK (like for commercial offset), you may experience a color shift. For sublimation, the ink is dye-based and the final colors depend on temperature and dwell time—test a print first.
5. Post-Production and Quality Control
After the item is made, inspect resolution and color fidelity. The transparent background should not leave ghost edges if the design was carefully placed. If you notice pixelation, you scaled too large. If colors are flat, check your printer profile. For stickers and decals, ensure the cut line matches the design—no extra border.
Practical Implementation Tips
- Test before batch production. Print one item first. Adjust size, position, and heat settings. This saves materials and time.
- Use layers wisely. Keep the original clipart as a locked base layer. Make all edits on duplicate layers.
- Organize by use case. If you run an Etsy shop for Valentine items, create a folder called “Valentine2025/Clipart/FairyDogs” and save your finished project files there.
- Know your printer’s printable area. Mug printers often have a fixed platen. Fit the clipart within the safe zone. For t-shirts, avoid designs stretching into seams.
- Beware of “transparent” pitfalls. Some print software assumes a white background if you do not set the canvas as transparent. Always preview against a dark background in your software.
- Scale to avoid loss. If you need a larger dimension than the original file, consider vectorizing the PNG if your software can trace it (like Image Trace in Illustrator). The result will be scalable without resolution loss, but the traced vector won’t be identical—especially with gradients and fine details.
Compatibility with Other Tools and Methods
This clipart works across multiple platforms because of the standard PNG format. It is not exclusive to sublimation; the name highlights the intended use but does not restrict it. Here are common integrations:
- Cricut / Silhouette: Import PNG, let the software remove the background automatically (already transparent). Set as a Print Then Cut image. Use for stickers, iron-ons, or cardstock layering.
- Photoshop / Procreate: Use as a layered element in composite designs. Add a background pattern or gradient behind the fairy dog.
- Online mockup generators: Upload the PNG directly into a product mockup. The transparent background makes placement seamless.
- Etsy listings: Use the clipart to create listing images showing the design on a mug or shirt. Many sellers also include the clipart in digital bundles.
- Social media graphics: Create Valentine posts or stories using the clipart overlayed on solid backgrounds. The transparency simplifies compositing.
Managing Long-Term Use and Consistency
If you plan to use Valentine Fairy Dogs Sublimation Clipart across multiple seasons or product lines, maintain a consistent style. Since the clipart is thematic, its use is most effective around Valentine’s Day or any “love/fairy” themed events. However, you could repurpose elements for children’s birthday parties or fairy-themed merchandise. The key is color matching: if you use it on mugs this year and again next year, try to use the same base colors to keep your brand recognizable.
Track which products you have applied the clipart to. A simple spreadsheet with columns for product type, date, size used, and any adjustments helps avoid duplicate efforts or forgotten variations.
Final Practical Observations
Valentine Fairy Dogs Sublimation Clipart is a functional asset, not a finished product. Your success with it depends on how well you integrate it into your specific print method. A 300 dpi PNG with transparency is easy to work with, but requires attention to scale, mirroring, and color management. The time saved from not having to design from scratch is significant—but the time spent pre-flighting your prints is equally important.
If you are new to sublimation or clipart-based production, start with one product type (like stickers) to build confidence. Stickers forgive many mistakes because they are low-cost to test. Once you are comfortable with scaling and cut lines, move to mugs or apparel. Each substrate introduces variables—heat press time, pressure, fabric type—but the clipart itself remains consistent.
Ultimately, this digital product gives you a focused theme with tested resolution, allowing you to move from idea to physical item faster than drawing it yourself. Use it as part of a broader planning cycle: decide your target audience, choose the clipart that fits, prepare your files, produce a sample, then scale production. This workflow approach turns a simple PNG into a reliable revenue or creative asset.